


Connecting to a printer and printing via Wi-Fi (EOS M6 Mark II)
Solution
Print images over a Wi-Fi connection from printers compatible with PictBridge (wireless LAN) technology.
This section describes how to connect the camera directly to a printer via Wi-Fi and to print images.
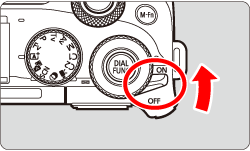
1. Turn the camera on.
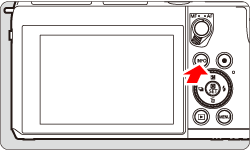
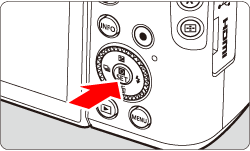
2. Press the <  > button.
> button.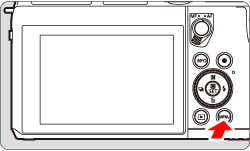
3. Press the <  > button to choose the [
  ] tab.
> button to choose the [ ] tab.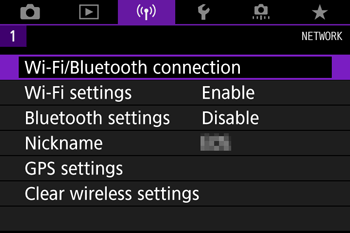
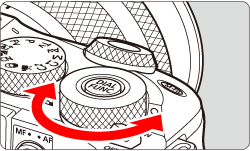
4. Turn the <  > dial to choose [ Wi-Fi/Bluetooth connection ], press <
  >.
>.
> dial to choose [ Wi-Fi/Bluetooth connection ], press < >.
5. Turn the < > dial to choose [  Print from Wi-Fi printer ], press < >.
> dial to choose [ Print from Wi-Fi printer ], press < >.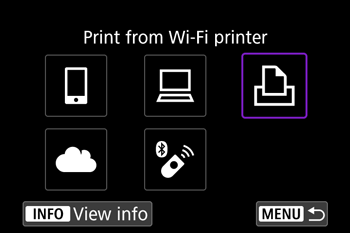
NOTE
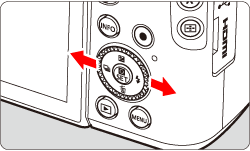
- When the following screen appears, press the <
 > <
> <  > buttons to switch to other screens.
6. Turn the < > dial to choose [ Add a device to connect to ], press < >.
> dial to choose [ Add a device to connect to ], press < >.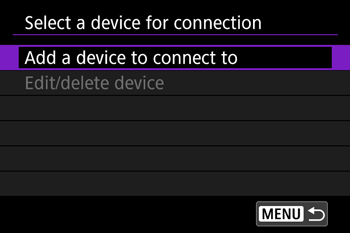
7. Check the SSID (  ) and password (
  ).
).
) and password ( ).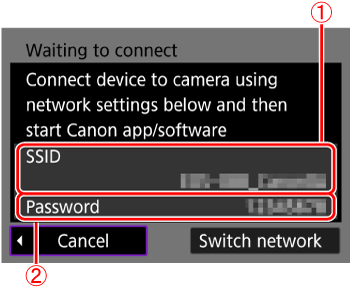
8. Use the printer to connect to the camera via Wi-Fi.
- In the printer’s Wi-Fi setting menu, choose the SSID (network name) displayed on the camera to establish a connection.
- In the password field on the printer, enter the password displayed on the camera.
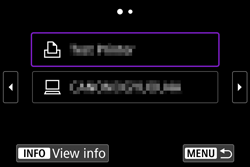
9. Turn the < > dial to choose the printer to use and press < >.
> dial to choose the printer to use and press < >.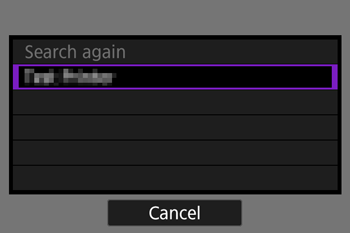
- Images on the memory card are displayed after the devices are connected via Wi-Fi.
10. Turn the < > dial to choose an image and press < >.
> dial to choose an image and press < >.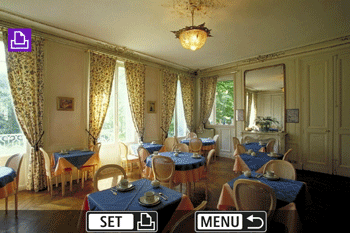
11. Turn the < > dial to choose [ Print image ] and press < >.
> dial to choose [ Print image ] and press < >.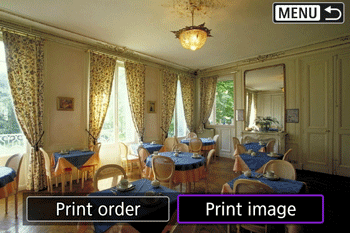
12. Turn the < > dial to choose [Print], and press < >.
> dial to choose [Print], and press < >.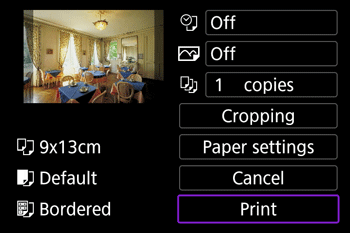
13. [ Start printing ] will be displayed, turn the < > dial to choose [ OK ], press < >.
> dial to choose [ OK ], press < >.- Printing now begins.
- To print other images, after printing is finished, repeat this procedure from step 10.
Use the on-screen keyboard to enter information. Note that the length and type of information you can enter varies depending on the function you are using.
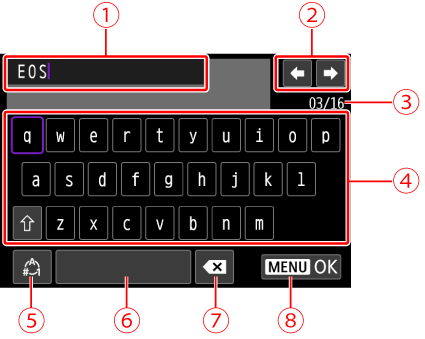
| Input area, for entering text |
| Cursor keys, for moving in the input area |
 | Current no. of characters/no. available |
 | Keyboard |
 | Switch input modes |
 | Space |
 | Delete a character in the input area |
 | Finish the text entry |