11-Oct-2017
8203468100
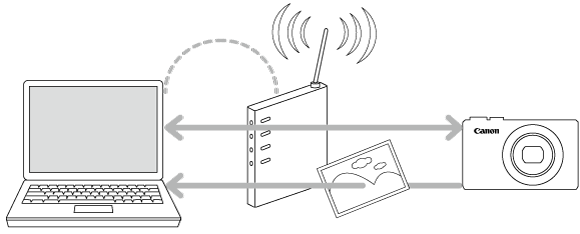
 icon, and camera setting procedures are indicated by the
  icon.
icon. Download the CameraWindow software from the Canon website and install it on the computer.
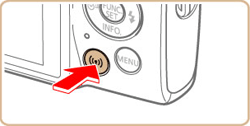
  1. Press the [
  ] button.
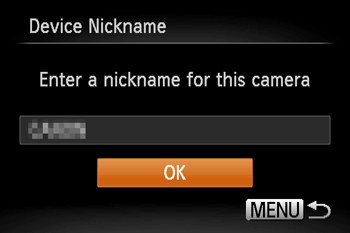
 2. If the [Device Nickname] screen is displayed, press the [
  ] [
] [  ] buttons to choose [OK], and then press the [
  ] button.
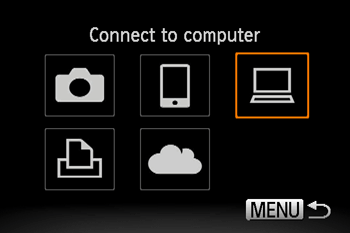
 3. Press the [
  ] [
] [  ] [
] [  ] [
] [  ] buttons to choose [
  ], and then press the [
  ] button.
 4. Press the [
  ] [
] [  ] buttons to choose [Add a Device], and then press the [
  ] button.
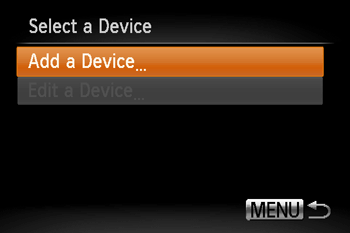
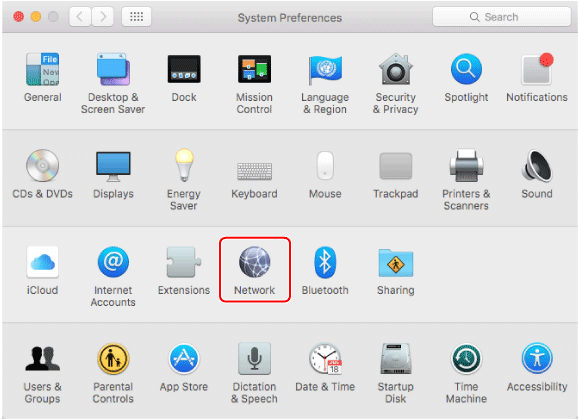
 5. Click the [System Preferences] icon in the dock.
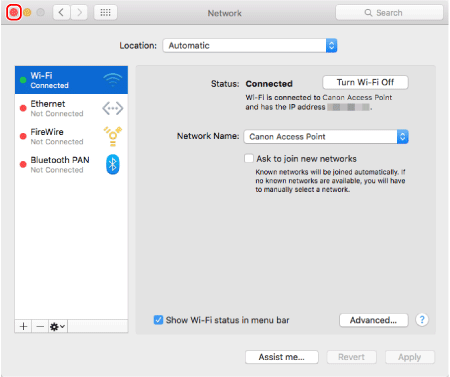
 6. Click the [Network] icon.
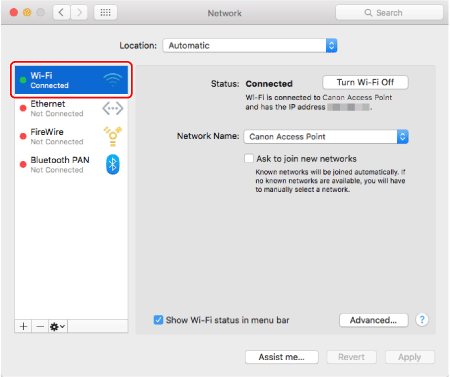
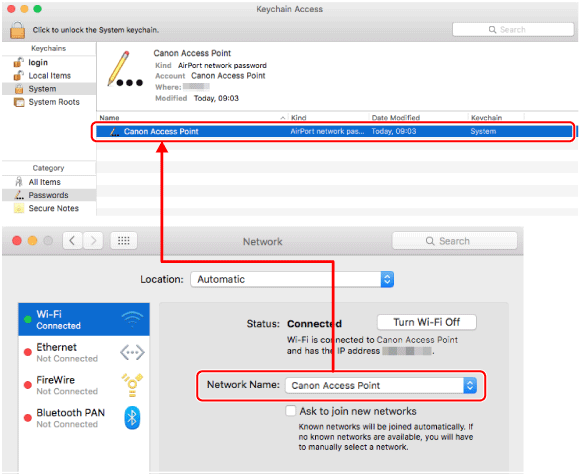
 7. Click [Wi-Fi].
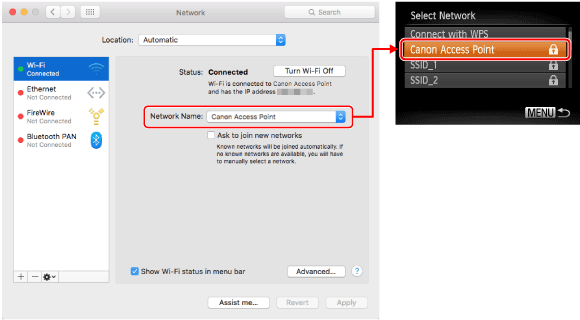
 8. Select the network that matches with the one displayed in the [Network Name] field, and then press the [
  ] button.
 9. Double-click the hard disk icon.
 10. Double-click [Applications].
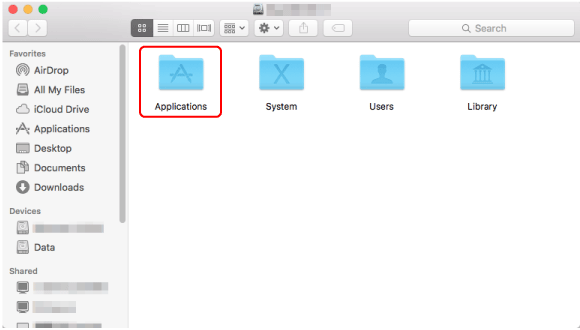
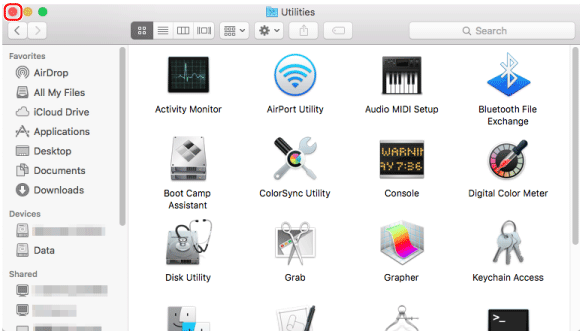
 11. Double-click [Utilities].
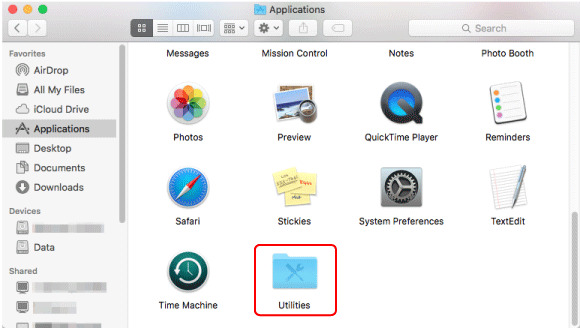
 12. Double-click [Keychain Access].
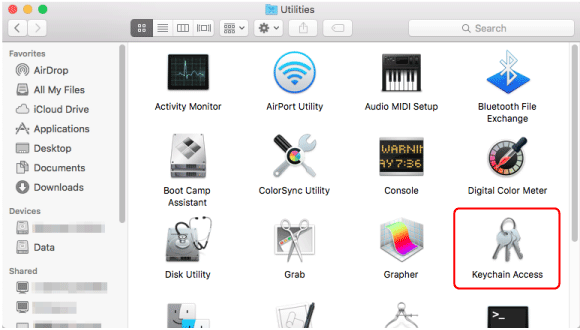
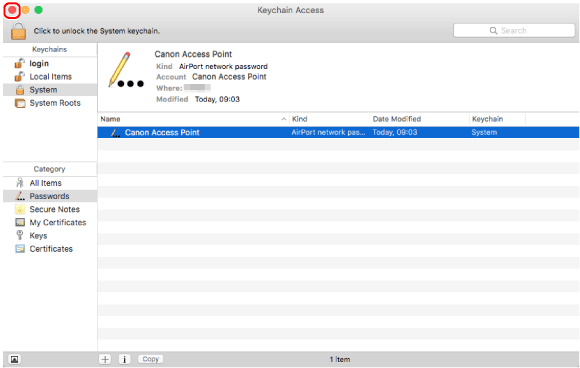
 13. Select [System] from the [Keychains] list.
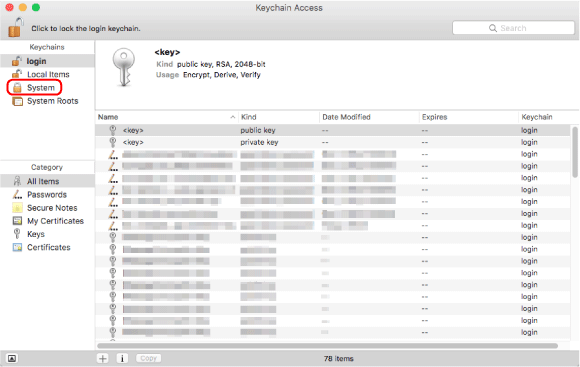
 14. Select [Passwords] from the [Category] list.
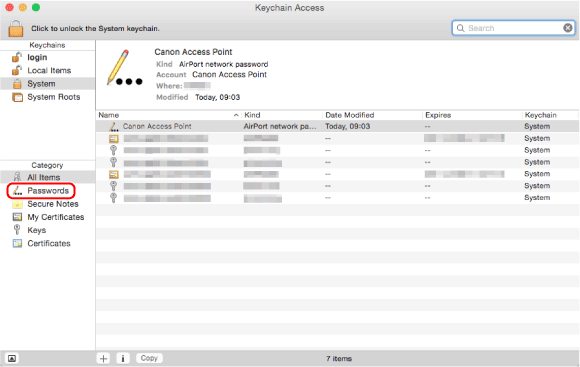
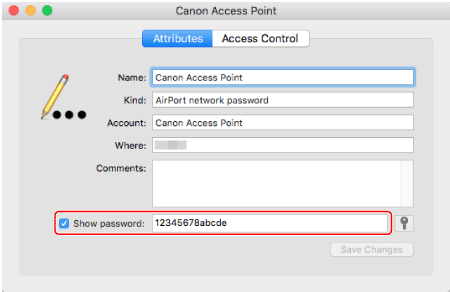
 15. Double-click on the network that matches with [Network Name] on the [Network] screen.
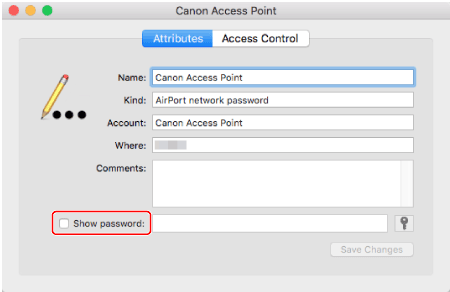
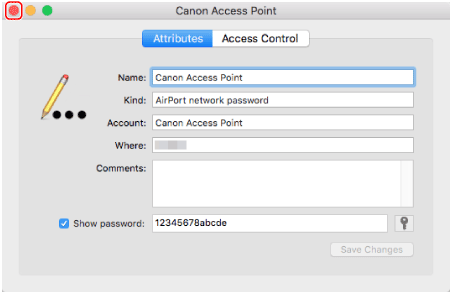
 16. Check the [Show password] box.
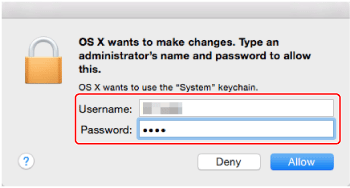
 17. Enter the password that you use to log in to your Macintosh.
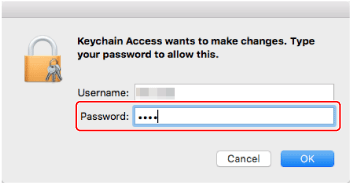
 18. When the screen below appears, enter the username and password used to log in to Macintosh.
 19. The access point password is displayed.
 20. Press the [
  ] [
] [  ] buttons to choose the password entry field, and then press the [
  ] button.
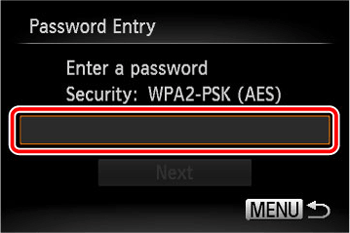
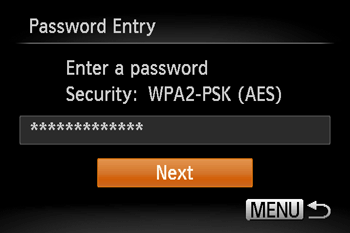
 21. Enter the password displayed in the [Show password] field.
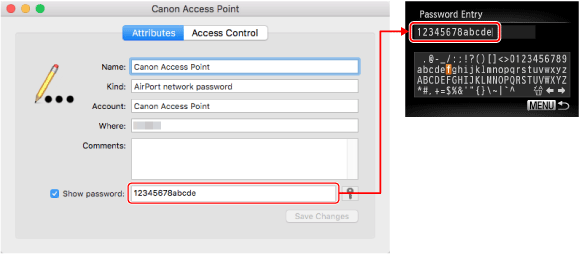
 ] [
] [  ] [
] [  ] [
] [  ] buttons to choose a character, and then press the [
  ] button.
 ] or [
  ] and press the [
  ] button.
  ] and press the [
  ] button to delete the previous character.
 22. After you have finished entering the encryption key, press the [
  ] [
] [  ] buttons to choose [Next], and then press the [
  ] button.
 23. Click [
  ] to close the window.
 24. Click [
  ] to close [Keychain Access].
 25. Click [
  ] to close [Utilities].
 26. Click [
  ] to close [Network].
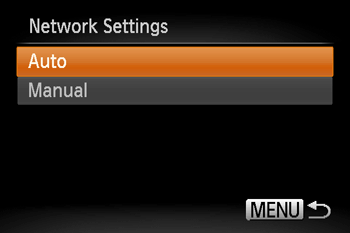
 27. Press the [
  ] [
] [  ] buttons to choose [Auto], and then press the [
  ] button.
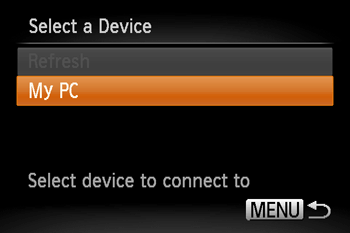
 28. Press the [
  ] [
] [  ] buttons to choose the name of the computer you want to connect with, and then press the [
  ] button.
 1. Click the [CameraWindow] icon in the dock.
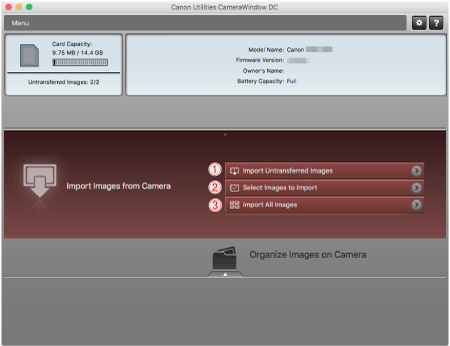
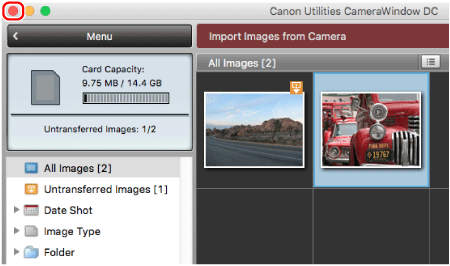
 2. Click [Import Images from Camera].
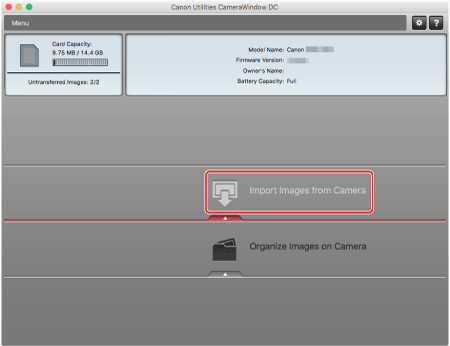
 3. Select and click one of the following: [Import Untransferred Images] (
  ), [Select Images to Import] (
  ) or [Import All Images] (
  ).
).
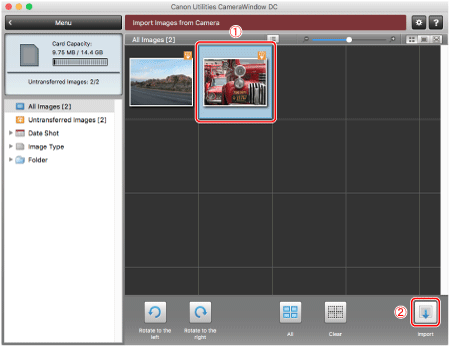
 4. If you chose [Select Images to Import] in step 3, select the images you want to import (
  ), and then click [Import] (
  ) (
) (  ).
).
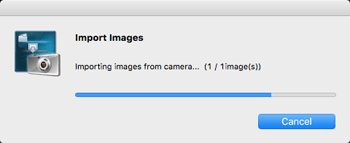
 5. The following window will appear, and the computer will start to transfer images from the camera.
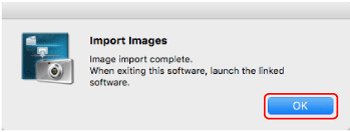
 6. The following window will appear, so click [ OK ].
 7. Click [
  ] to close [CameraWindow].
 8. A folder with the images you saved will open.