Solution
With the interval timer, you can set the shooting interval and the number of shots. The camera will automatically repeat taking one shot with the set interval until the set number of shots are taken.
1. Turn on the camera.
- Set the camera's power switch to <ON>.
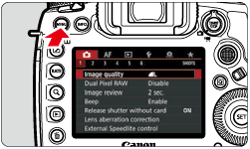
2. Press the < MENU > button to display the menu screen.
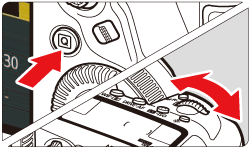
3. Press the <

> button, then turn the <

> dial to select the [

] tab.
NOTE
In <

> mode, the setting is located in the [

] tab.
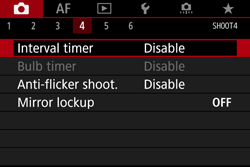
4. Turn the <

> dial to select [ Interval timer ], then press <

>.
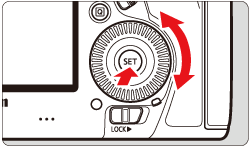
5. Turn the <

> dial to select [Enable], then press the < INFO. > button.
| Interval | Settable from [00:00:01] to [99:59:59]. |
| No. of shots | Settable from [01] to [99]. If you set [00], the camera will keep shooting until you stop the interval timer. |
7. Turn the <

> dial to select [OK], then press <

>.
8. The interval timer is set.
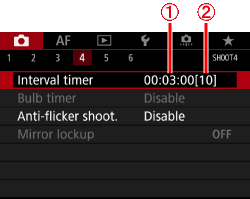
- The interval timer settings will be displayed on the menu screen.

Interval

No. of shots
- [
 ] will be displayed on the LCD panel.
9. Take the picture.
Shooting will start according to the interval timer settings.
- During interval timer shooting, [
 ] will blink.
- After the set number of shots are taken, the interval timer shooting will stop and be automatically canceled.
NOTE
- Taking test shots in advance is recommended.
- Using a tripod is recommended.
- After the interval timer shooting starts, you can still press the shutter button completely to take a picture as usual. However, approx. 5 sec. before the next interval timer shooting, the shooting function settings, menu operation, image playback, and other operations will be suspended, and the camera will be ready to shoot.
- If a picture is being taken or an image is being processed when the next shot is scheduled on the interval timer, the shot set for that time will be skipped. The camera will thereby shoot fewer shots than the number set for interval timer shooting.
- Auto power off operates with the interval timer. The power will automatically turn on approx. 1 min. before the next shot.
- Interval timer shooting can also be combined with AEB, WB bracketing, multiple exposures, and HDR mode.
- You can stop the interval timer shooting by selecting [Disable] or turning the power switch to <OFF>.
IMPORTANT
- Do not point the camera toward an intense light source, such as the sun or an intense artificial light source. Doing so may damage the image sensor or the camera’s internal components.
- If the lens’s focus mode switch is set to < AF > the camera will not shoot when focus is not achieved. Setting it to < MF > and focusing manually is recommended.
- Live View shooting, movie shooting, or bulb exposures cannot be performed with interval timer.
- For prolonged interval timer shooting, using the household power outlet accessories (sold separately, DC Coupler DR-E6 and AC Adapter AC-E6N) is recommended.
- If a long exposure or shutter speed longer than the shooting interval is set, the camera cannot shoot at the set interval. The camera will thereby shoot fewer shots than the number set for interval timer shooting. Also, the number of shots may decrease when the shutter speed and the shooting interval are nearly the same.
- If card recording time is longer than the set shooting interval, due to card performance or shooting settings, etc., the camera may not shoot at the set shooting interval.
- If you use flash with interval timer shooting, set an interval longer than the flash’s recycling time. Otherwise, if the interval is too short, the flash may not fire.
- If the shooting interval is too short, the camera may not take a picture or may capture an image without autofocusing.
- Interval timer shooting will be canceled and reset to [Disable] if you do any of the following: Set the power switch to < OFF >, display the Live View shooting or movie shooting screen, set the shooting mode to < B >, <
 > <
> <  > <
> <  >, or use EOS Utility.
- After interval timer shooting starts, you cannot use remote control shooting or remote-release shooting with an EOS-dedicated, external Speedlite.
- If your eye will not remain on the viewfinder eyepiece during interval timer shooting, attach the eyepiece cover. If stray light enters the viewfinder when the picture is taken, it may throw off the exposure.
 > button, then turn the <
  > dial to select the [
  ] tab.
 > mode, the setting is located in the [
  ] tab.
 > dial to select [ Interval timer ], then press <
  >.
>.
 > dial to select [Enable], then press the < INFO. > button.
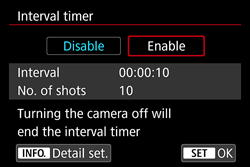
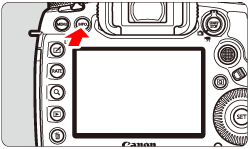
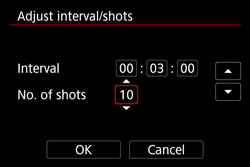
 > dial to select the hour, minute, second, or number of shots.
  > so [
  ] is displayed.
  > dial to select the desired number, then press <
  > (Returns to [
  ]).
]). 
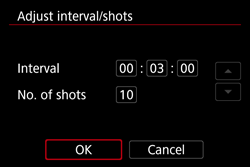
 > dial to select [OK], then press <
  >.
>.
 Interval
  No. of shots
 ] will be displayed on the LCD panel.
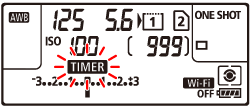
 ] will blink.
  > <
> <  > <
> <  >, or use EOS Utility.