Solution
You can connect two cameras via Wi-Fi and send images between.
NOTE
- Only Canon-brand cameras equipped with a Wi-Fi function can be connected to wirelessly. Even Canon-brand cameras that support Eye-Fi cards cannot be connected to if they do not have a Wi-Fi function. You cannot connect to PowerShot SD430 DIGITAL ELPH WIRELESS/DIGITAL IXUS WIRELESS cameras with this method.
- Connections require that a memory card be in the camera.
- Keep your fingers or other objects off the Wi-Fi antenna area. Covering this may decrease the speed of your image transfers.
- Depending on the condition of the network you are using, it may take a long time to send movies. Be sure to keep an eye on the camera battery level.
- Up to 50 images can be sent together at once. One movie up to five minutes (or one digest movie up to 13 minutes) can be sent.
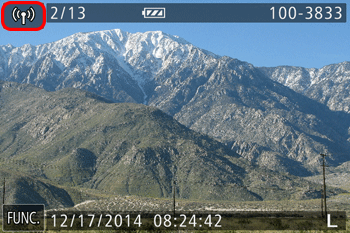
- On the screen, wireless signal strength is indicated by the following icons.
[

] high, [

] medium, [

] low, [

] weak
Connecting the cameras via Wi-Fi
Perform the following operations on both of the cameras to be connected.
1. Press the <Playback> (

) button to turn the camera on.
NOTE
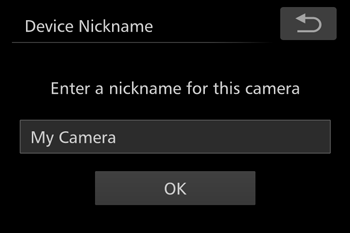
When making Wi-Fi settings for the first time, a screen will appear for you to register a nickname for the camera.
Touch inside the frame to access the keyboard, and then enter a nickname. This nickname will be displayed on the screen of target devices when connecting to other devices via Wi-Fi.
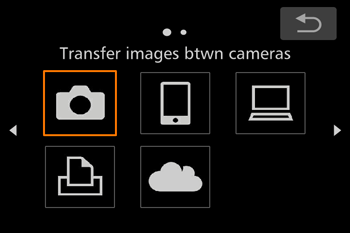
3. Touch [

].
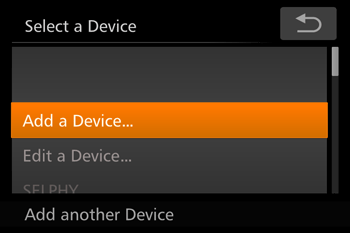
4. Drag your finger up or down on the screen to choose [Add a Device].
NOTE
- Once a camera is added, the camera nickname will be displayed on the screen in step 4. To connect to a camera again, simply choose the camera nickname from the list.
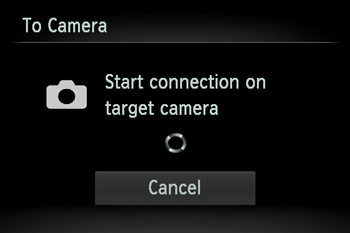
5. The following screen appears.
Perform steps 1 – 4 on the other camera as well.
Camera connection information will be added when [Start connection on target camera] is displayed on both camera screens.
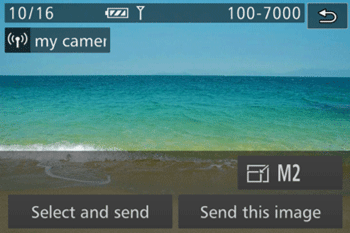
Once the other camera is registered, the screen for sending images will appear. Please see step 7 and later steps for instructions on how to send images.
6. Once both cameras are connected, a screen similar to the following one will be displayed.
NOTE
- Once you have connected to devices via the Wi-Fi menu, recent destinations will be listed first when you access the Wi-Fi menu. You can easily connect again by choosing the device. You can register new devices by dragging left or right to access the device selection screen.
- If you prefer not to display recent target devices, touch [FUNC.], and then choose [MENU] > [
 ] tab > [Wi-Fi Settings] > [Target History] > [Off].
- To add multiple cameras, repeat the above procedures starting from step 2.
Sending Images to a Camera Individually
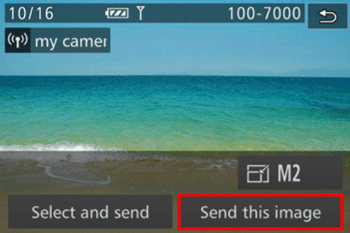
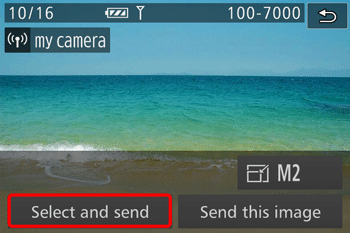
7. Touch [Send this image].
NOTE
- You can choose the resolution (size) of images to send by touching [
 ] on the image transmission screen.
- Movies cannot be resized.
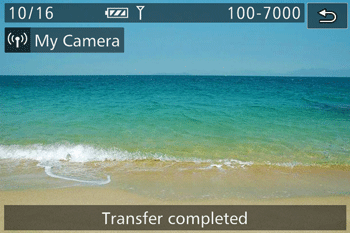
8. The following screen appears.
After the image has been sent to the target camera and the [Transfer completed] message appears, return to step 7.
9. Touch [Select and send].
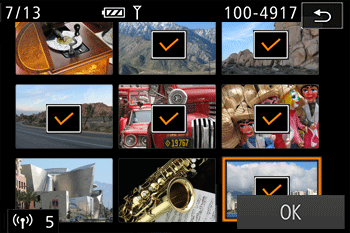
10. The following screen appears.
- Touching an image to send will label it with a [
 ] icon.
- To cancel selection, touch the image again. [
 ] is no longer displayed.
- If you move the zoom ring toward [
 ], the camera will switch to single-image display. You can also drag left or right across the screen to choose images.
- After you finish choosing images, touch [OK].
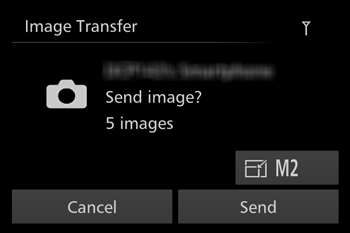
11. The following screen appears.
NOTE
- You can choose the resolution (size) of images to send.
- Movies cannot be resized.
Touch [Send].
- [Transfer completed] is displayed after the image is sent, and the image transfer screen is displayed again.
- To disconnect, touch [
 ] in the upper right, and then touch [OK] on the confirmation screen.
 ] high, [
  ] medium, [
  ] low, [
  ] weak
 ) button to turn the camera on.
 ].
].
 ] tab > [Wi-Fi Settings] > [Target History] > [Off].
 ] on the image transmission screen.
 ] icon.
 ] is no longer displayed.
 ], the camera will switch to single-image display. You can also drag left or right across the screen to choose images.
 ] in the upper right, and then touch [OK] on the confirmation screen.