Solution
By recording a time-lapse movie that combines images shot at a specified interval, you can create movies with fast-moving stars. You can adjust the shooting interval and recording duration as needed.
Note that each session takes a long time, and requires many shots. Check the battery level and memory card space in advance.
The procedure for shooting start time-lapse movies is explained below.
1. Press the <Power> button to turn the camera on.
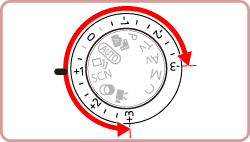
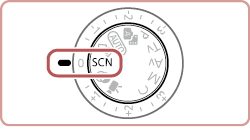
2. Set the mode dial to [

].
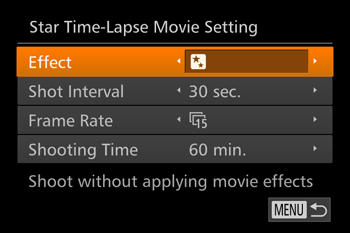
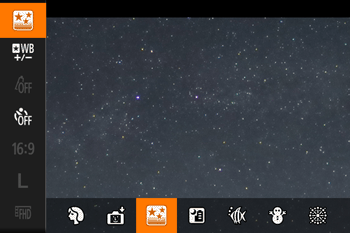
3. Press the <

> button, choose [

]* in the menu, press the <

><

> buttons or turn the <

> dial to choose [

], and then press the <
> button.
*If the default settings have not been changed, [
] will be displayed.
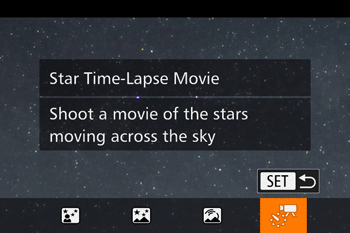
4. Press the <

> button, press the <
><
> buttons or turn the <
> dial to choose [

], and then press the <
> button.
Zoom is set to maximum wide angle and cannot be adjusted.
6. Mount the camera on a tripod or take other measures to keep it still.
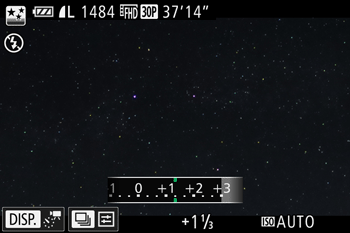
7. Check the brightness.
- Press the shutter button all the way down to shoot a single still image.
- Switch to Playback mode and check image brightness.
- To adjust brightness, turn the exposure compensation dial and change the exposure level. Check brightness again by taking another shot.
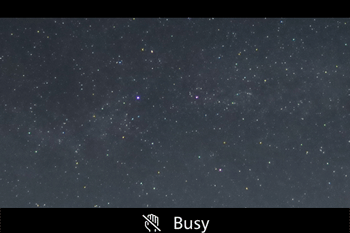
8. Press the movie button to shoot.
[Busy] is displayed briefly, and then shooting begins.
- Do not disturb the camera while shooting.
- To cancel shooting, press the movie button again. Note that cancellation may take up to about 60 seconds.
- The camera operates in Eco mode while shooting.
REFERENCE
- There will be a delay before you can shoot again, as the camera processes the images.
- If the camera runs out of battery power or memory card space, shooting stops and a movie created from the images up to that point is saved.
- ISO is set to Auto and cannot be changed.
- Aperture cannot be changed manually.
- The [Date/Time] you started shooting will be recorded in the image.
NOTE
- Sound is not recorded.
- For easier viewing, try choosing MENU > [
 ] tab > [Night Display] > [On] before shooting.
- You can also access the screen in step 5 by choosing MENU > [ ] tab > [Star Time-Lapse Movie Setting].
- To save each shot collected before the movie is created, choose MENU > [ ] tab > [ Save Stills] > [On]. Note that these individual images are managed as a single group, and during playback, only the first image is displayed. To indicate that the image is part of a group, [
 ] is displayed in the upper left of the screen. If you erase a grouped image, all images in the group are also erased. Be careful when erasing images.
- Try switching to manual focus mode to more accurately specify the focal position before shooting.
- Battery performance decreases at low temperatures. Try warming the battery pack a little by putting it in your pocket, for example, ensuring that the terminals do not touch any metal objects.
- Even if you specify [Unlimited] in [Shooting Time] in step 5 and use an AC adapter kit (sold separately, shooting will stop after about 8 hours, at most.
 > button to display the screen shown in the example image below. Movie settings can be configured on this screen.