


CameraWindow does not run (Mac OS X)
Solution
If CameraWindow does not run when a camera is connected, uninstalling (deleting) and reinstalling the software is recommended.
(Uninstalling is the process of deleting unnecessary drivers or software in the event that a problem has occurred.)
IMPORTANT
- Administrator rights are required in order to install or uninstall software.
- Before beginning the procedure, be sure to back-up/move any image files that you have saved to the [CameraWindow] folder.
- The screens displayed may differ depending on the model you use.
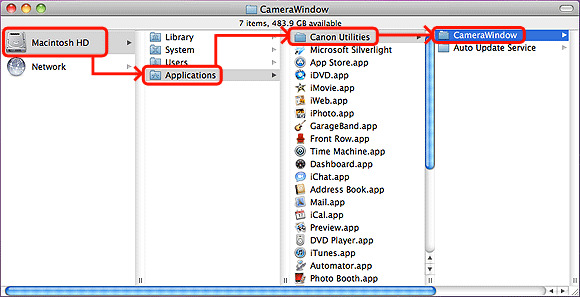
1. Click the icon of the hard disk to which the image folder was installed, and then select [Applications] > [Canon Utilities] > [CameraWindow].
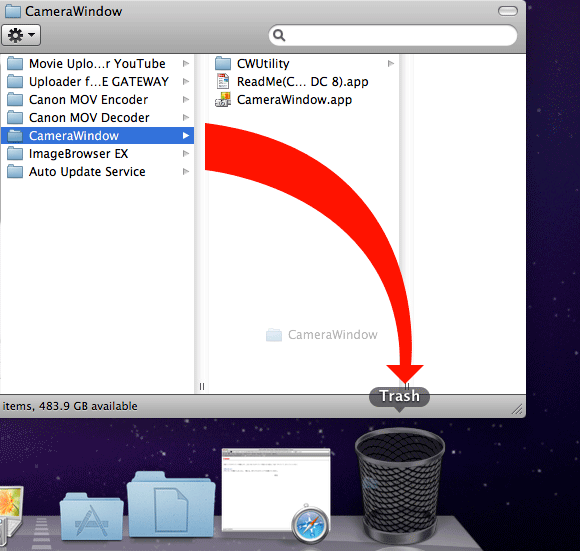
2. Move the [CameraWindow] folder to [Trash].
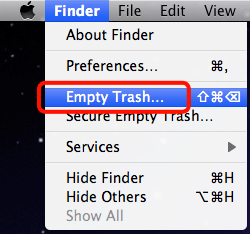
3. From the [Finder] menu, select [Empty Trash].
4. If the [ImageBrowser EX] icon still remains under [Dock], drag the icon to [Trash] to delete it.
This completes the process of uninstalling [CameraWindow].
IMPORTANT
- Make sure to restart your computer after deleting [CameraWindow]. If the computer is not restarted after uninstalling [CameraWindow], operation problems may occur when the software is reinstalled.
5. Confirm that all open programs have been closed.
6. Download the software from the Canon home page.
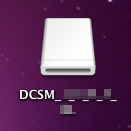
7. Double-click on the downloaded file.

8. Double-click the folder extracted from the contents of the downloaded file.
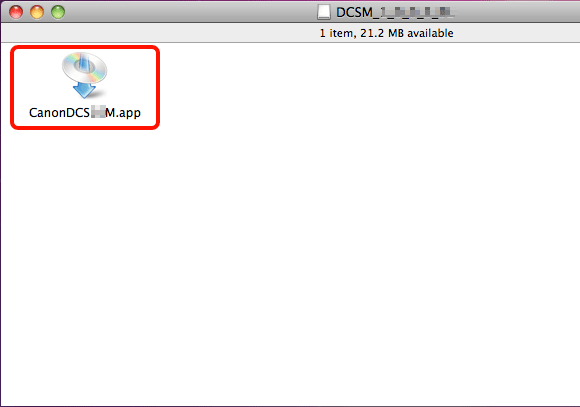
9. Double-Click [CanonDCSxxW.app].
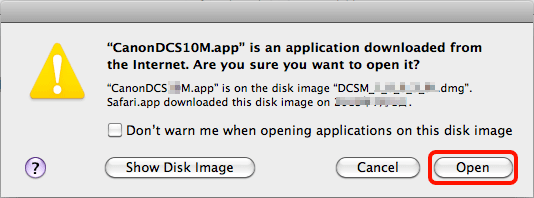
10. The following screen appears. Click [Open].
10. Select the area in which you live.

12. Select the country where you live, and then click [Next].

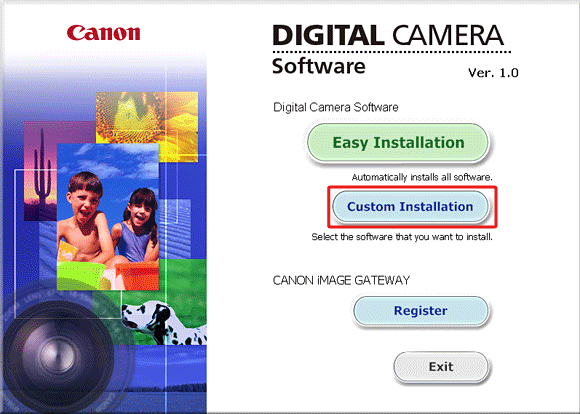
13. Click [Custom Installation] when the screen below is displayed.
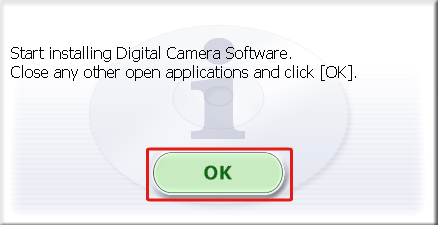
14. Click [OK].
15. When the screen below appears, append  CameraWindow with a checkmark (
 ), and then click
  [Next].
CameraWindow with a checkmark (), and then click [Next].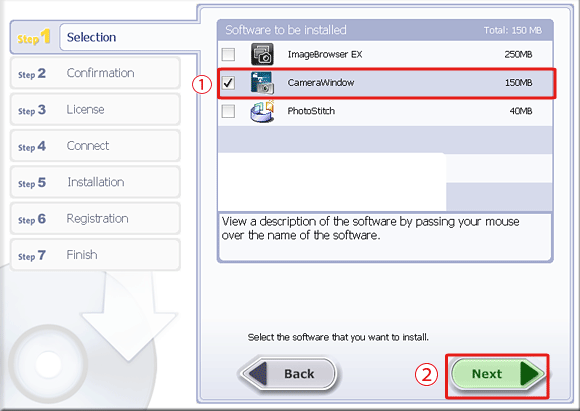
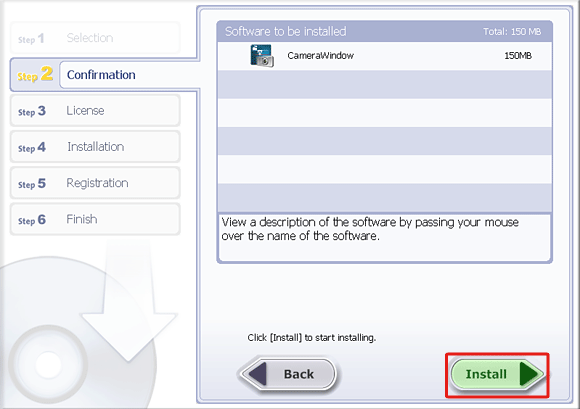
16. Click [Install].
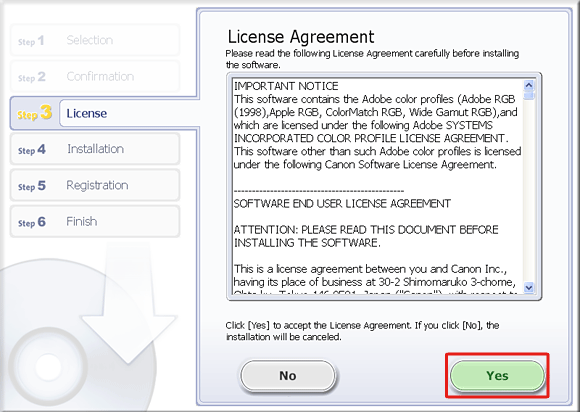
17. Click [Yes] to accept the License Agreement.
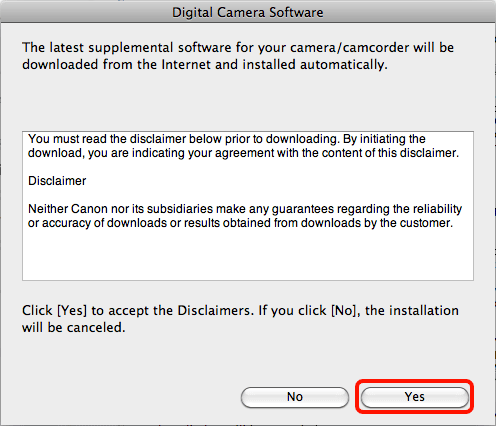
18. When the following screen appears, read it carefully.
If you agree to the disclaimers, click [Yes].
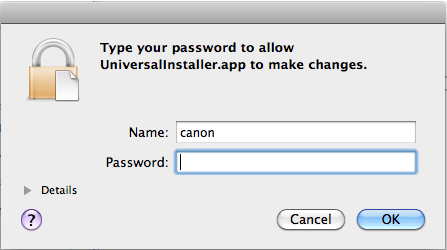
19. If the following screen appears, enter your computer’s password and click [OK].
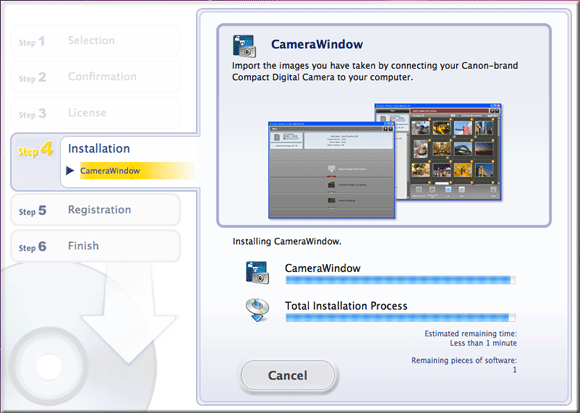
20. The following screen appears, and installation begins.
21. Click [Next].
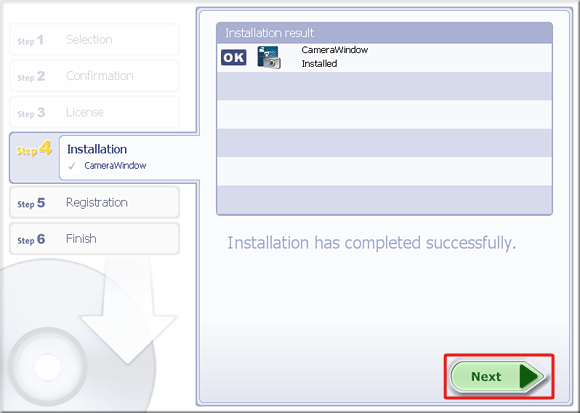
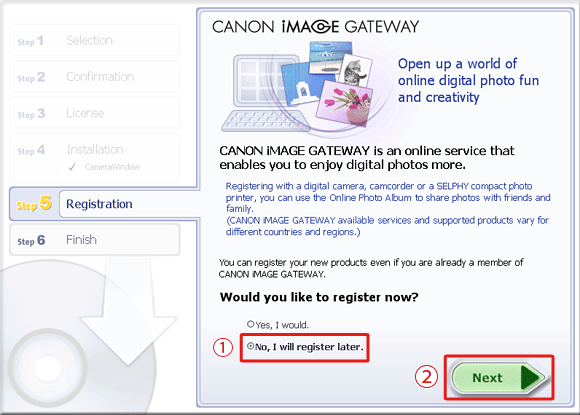
22. The following screen appears.
In this example [No, I will register later] has been selected, and [Next] has been clicked.
[No, I will register later] has been selected, and [Next] has been clicked. (To register in CANON iMAGE GATEWAY, select [Yes, I would] and complete the registration procedure.)
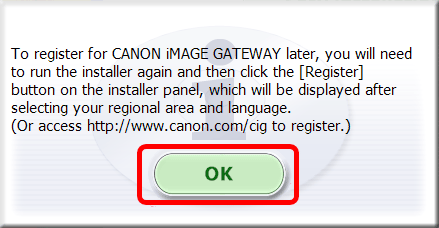
23. Click [OK].
24. The following screen appears. Click [Restart] to restart the computer.
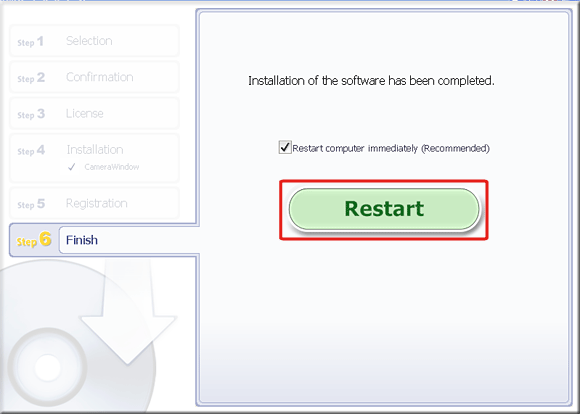
REFERENCE
If it is not necessary to restart the computer, a [Finish] screen will be displayed.
In this case, please click [Finish].
