Solution
When you select images to use in photobooks (up to 998 images) and use EOS Utility (provided software) to transfer them to a computer, the selected images will be copied into a dedicated folder. This function is useful for ordering photobooks online and for printing photobooks on a printer.
Specify One Image at a Time
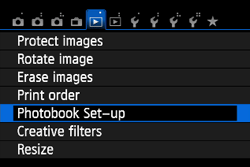
1. Select [Photobook Set-up].
Under the [

] tab, select [Photobook Set-up], then press <SET>.
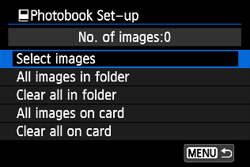
2. Select [Select images].
- Select [Select images], then press <SET>.
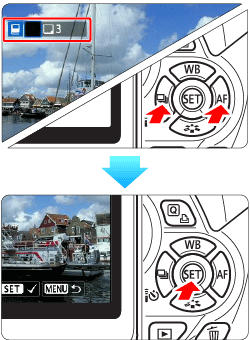
- To display the three-image display, press the <
 > button. To return to the single-image display, press the <
  > button.
3. Select the image to be specified.
- Press the <Cross keys> to select the image to be specified, then press <SET>.
- Repeat this step to select other images. The number of images which have been specified will be displayed on the screen’s upper left.
- To cancel the specified image, press <SET> again.
- To return to the menu, press the <MENU> button.
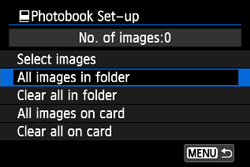
Specifying All Images in a Folder or on a Card
You can specify all the images in a folder or card at one time.
When [
: Photobook Set-up] is set to [All images in folder] or [All images on card], all the images in the folder or on the card will be specified.
To cancel the image specification, select [Clear all in folder] or [Clear all on card].
CAUTION
Do not specify images already specified for a photobook in another camera for another photobook with this camera. The photobook settings may be overwritten.
NOTE
- RAW images and movies cannot be specified.
- After downloading the specified images to your personal computer, also refer to EOS Utility’s Instruction Manual and your printer’s instruction manual.