Solution
If the card is new or was previously formatted by another camera or personal computer, format the card with the camera.
CAUTION
When the card is formatted, all images and data in the card will be erased. Even protected images will be erased, so make sure there is nothing you need to keep. If necessary, transfer the images to a computer, etc., before formatting the card.
1. Flip out the LCD monitor, and then set the power switch to <ON>.
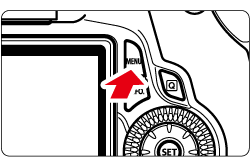
2. Press the <MENU> button to bring up the menu.
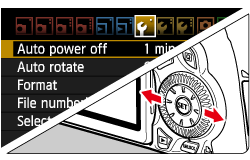
3. Press the <Multi-controller> to select [

].
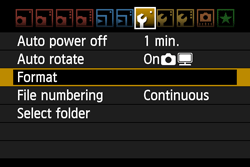
4. Select [Format], then press the <SET> button.
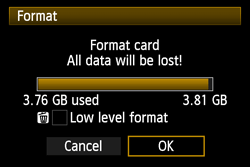
5. Select [OK], then press the <SET> button.
- The card will be formatted.
- When the formatting is completed, the menu will reappear.
For low-level formatting, press the <

> button to checkmark [Low level format] with [

], then select [OK]. Press <SET> button.
NOTE
About Low-level Formatting
- Do low-level formatting if the card's recording or reading speed seems slow.
- Since low-level formatting will erase all recordable sectors in the card, the formatting will take slightly longer than normal formatting.
- You can stop the low-level formatting by selecting [Cancel]. Even in this case, normal formatting will have been completed and you can use the card as usual.
IMPORTANT
- When the card is formatted or data is erased, only the file management information is changed. The actual data is not completely erased. Be aware of this when selling or discarding the card. When discarding the card, execute low-level formatting or destroy the card physically to prevent the data from being leaked.
- Before using a new Eye-Fi card, the software in the card must be installed in your computer. Then format the card with the camera.
REFERENCE
The card capacity displayed on the card format screen might be smaller than the capacity indicated on the card.

 ].
].


 > button to checkmark [Low level format] with [
  ], then select [OK]. Press <SET> button.