


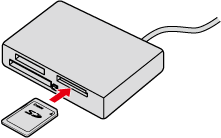
Transferring Images from a Computer to a Memory Card Using a Memory Card Reader (ZoomBrowser EX 6.x)
Solution
This section explains how to transfer images to a memory card using a card reader.
IMPORTANT
- To perform this operation, [ZoomBrowser EX 6.x] needs to be installed or updated beforehand.
- In this section, Windows 7 and [ZoomBrowser EX 6.6] are used as an example to explain the operations. If you are using Windows Vista or Windows XP, the on-screen displays and procedures may differ.
- If your computer has a built-in memory card reader, please refer to the instruction manual of your computer.
- For details on how to connect a memory card reader to a computer, please refer to the instruction manual of the memory card reader.
- Depending on the type of your computer or memory card reader, screen indications and operation procedures may vary slightly.
1. Insert a memory card into the memory card reader.
2. When the following window appears, click ( ) and close the window.
) and close the window.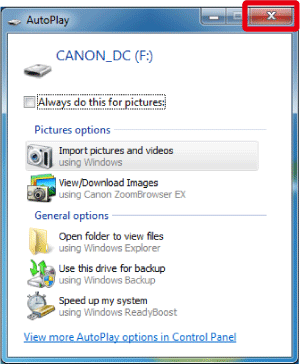
3. Double-click the [ZoomBrowser EX] shortcut icon on your desktop to start [ZoomBrowser EX].

If you cannot find the [ZoomBrowser EX] shortcut icon on your desktop, click [Start] ( ) > [All Programs] or [Programs] > [Canon Utilities] > [ZoomBrowser EX] and select [ZoomBrowser EX] to start [ZoomBrowser EX].
) > [All Programs] or [Programs] > [Canon Utilities] > [ZoomBrowser EX] and select [ZoomBrowser EX] to start [ZoomBrowser EX].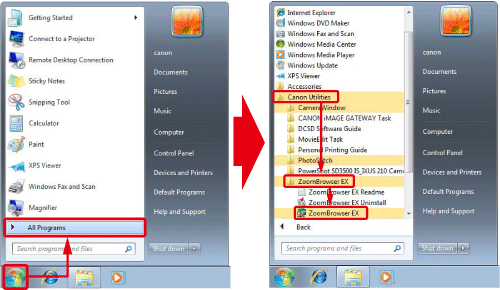
4. When [ZoomBrowser EX] starts, the following window appears.
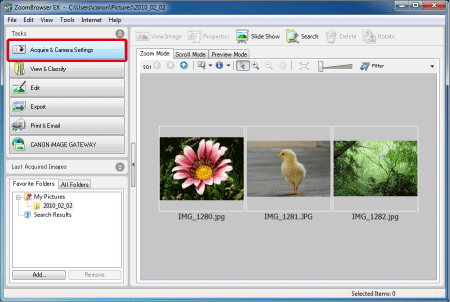
Click [Acquire & Camera Settings].
5. The following window appears.
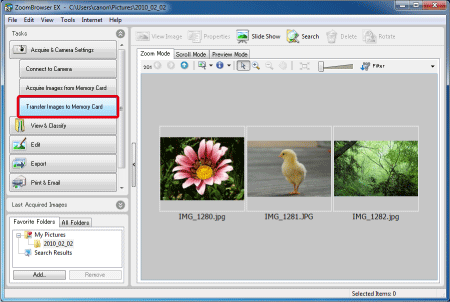
Click [Transfer Images to Memory Card].
6. The following window appears.
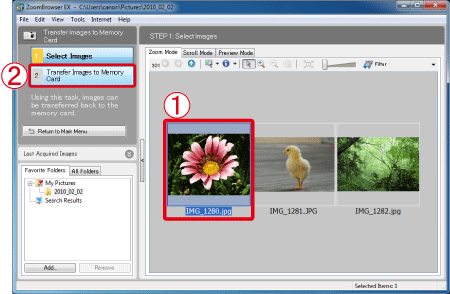
 From the browser area, select the images you want to transfer to the memory card.
 Click [Transfer Images to Memory Card].
7. The following window appears.
 Select the drive into which the memory card (transfer destination) is inserted. Click [OK].
8. The following window appears.
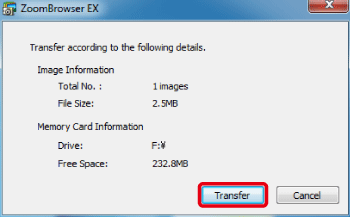
Check the details, and then click [Transfer].
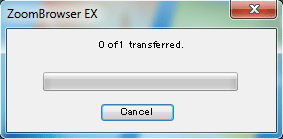
9. The following window appears, and the images are being transferred.
10. After the images are transferred, the following window appears.
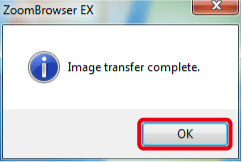
Click [OK].