


Setting Up Remote Shooting
Setting Up Remote Shooting
The [remote shooting] function enables you to control a connected camera from your computer.
|
Cautions:
|
||
|
|
-
|
For these operations, [ZoomBrowser EX] should be installed from the bundled CD-ROM (Solution Disk).
|
|
|
-
|
[Remote shooting] is only available with certain camera models, which list it as one of the features in the [Specifications] section of the Camera User Guide.
|
|
|
-
|
Ensure that you turn off your computer’s standby feature before you begin [remote shooting].
|
|
|
-
|
Except for the <shutter button>, the camera’s buttons cannot be operated while the camera is being remotely controlled.
|
|
|
-
|
The time lag between pushing the <shutter button> and the release of the shutter is slightly longer for [remote shooting] compared with the normal mode of operation.
|
|
|
-
|
Setting items and button names may differ according to the camera model.
|
|
|
-
|
The following instructions are intended for Windows Vista. The screen images and operations may differ slightly in Windows XP and Windows 2000.
|
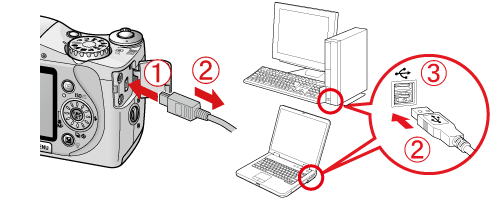
1. Connect the camera’s [DIGITAL Terminal] and the PC’s USB terminal with the [Interface Cable] supplied with the camera
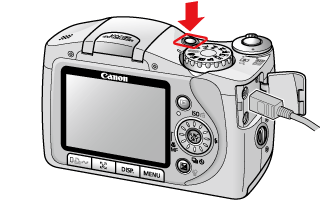
2. Turn on the camera.
3. The following window appears. Click the ( ) button to close the window.

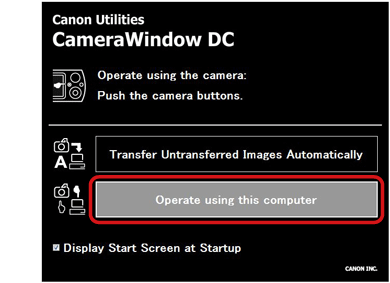
4. If the following window appears, click [Operate using this computer]. If this window does not appear, go to step 6.
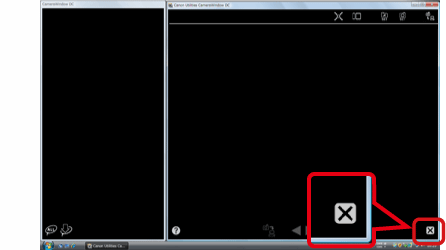
5. The following window appears. Click the ( ) button to close the window.
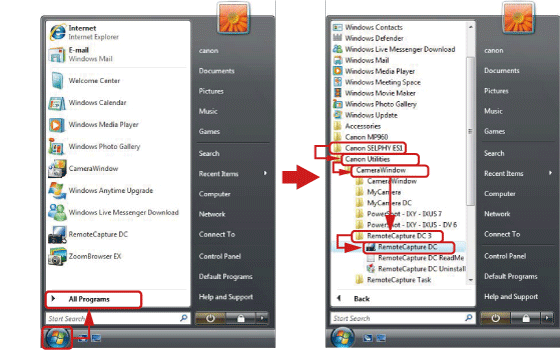
6. Click [Start] ( ) → [All Programs] or [Program] → [Canon Utilities] → [Camera Window] → [Camera Window] → [RemoteCapture DC3] → [RemoteCapture DC] in this order, and select [RemoteCapture DC] to start.
7. The following window appears, and [RemoteCapture DC] starts.
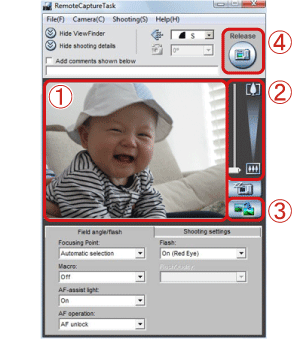
Click the (
Changing the shooting settings
To change the shooting settings, follow the instructions below.
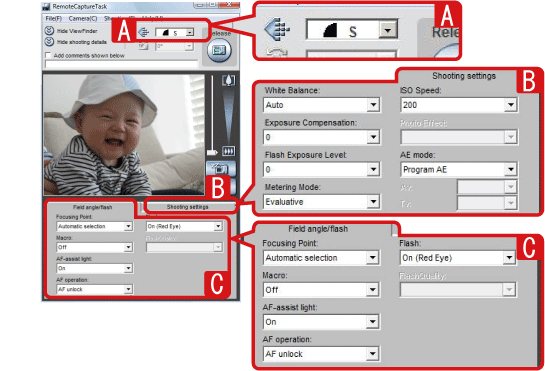
Settings that need to be set on the camera itself or functions that the camera does not support cannot be changed in this window.
For example, if it is necessary to lift the <flash> with your finger to make it work, if you do not lift the <flash> ahead of time, you will not be able to make settings in the [flash] field.
For example, if it is necessary to lift the <flash> with your finger to make it work, if you do not lift the <flash> ahead of time, you will not be able to make settings in the [flash] field.
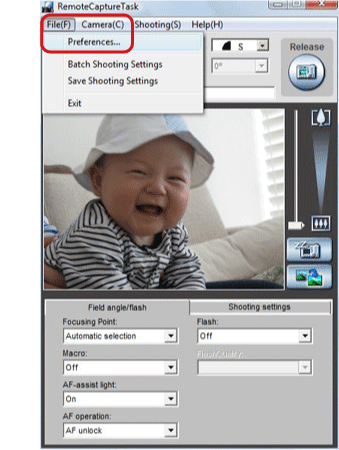
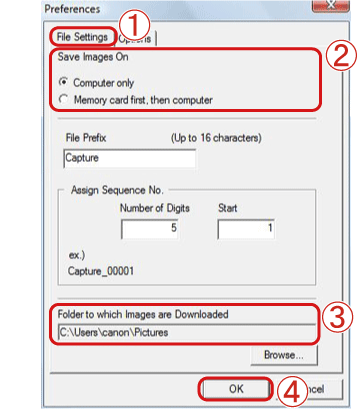
Checking and changing the destination for saving images
1. Select [Preferences] from the [File] menu in [RemoteCapture DC].
2. The following window appears.
[Interval timer shooting] and [Timer shooting]
In order to shoot images at set intervals of time or shoot an image after a set number of seconds, click the  [Shooting] menu in RemoteCapture DC and select
  [Interval Timer Shooting] or [Timer Shooting].
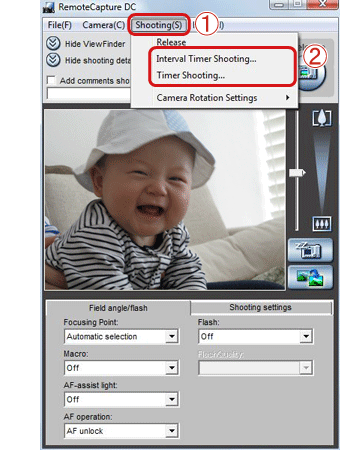
[Interval Timer Shooting]: Shoots images at set intervals of time
[Timer Shooting]: Shoots an image a set number of seconds later
[Timer Shooting]: Shoots an image a set number of seconds later
This completes the process of setting up remote shooting.